One year of 3d printing rockets
After working some time with other university students building a rocket, I wanted to be more involved in the design of the rocket. To do so I decided to leave and start doing everything from scratch. It has been a little more than a year since I started this journey, and I am very proud of what I was able to achieve. I learned a lot of things and had a lot of fun in the process!
In this blog I will briefly explain the basic construction of my rockets, and then I will do a sort of journal of the launch dates I had over this year!
Rocket contstruction
In future posts I will go into more detail on the how I built the various components and the tools I used to design the rocket, but for the meantime here is the basic idea behind my rocket:
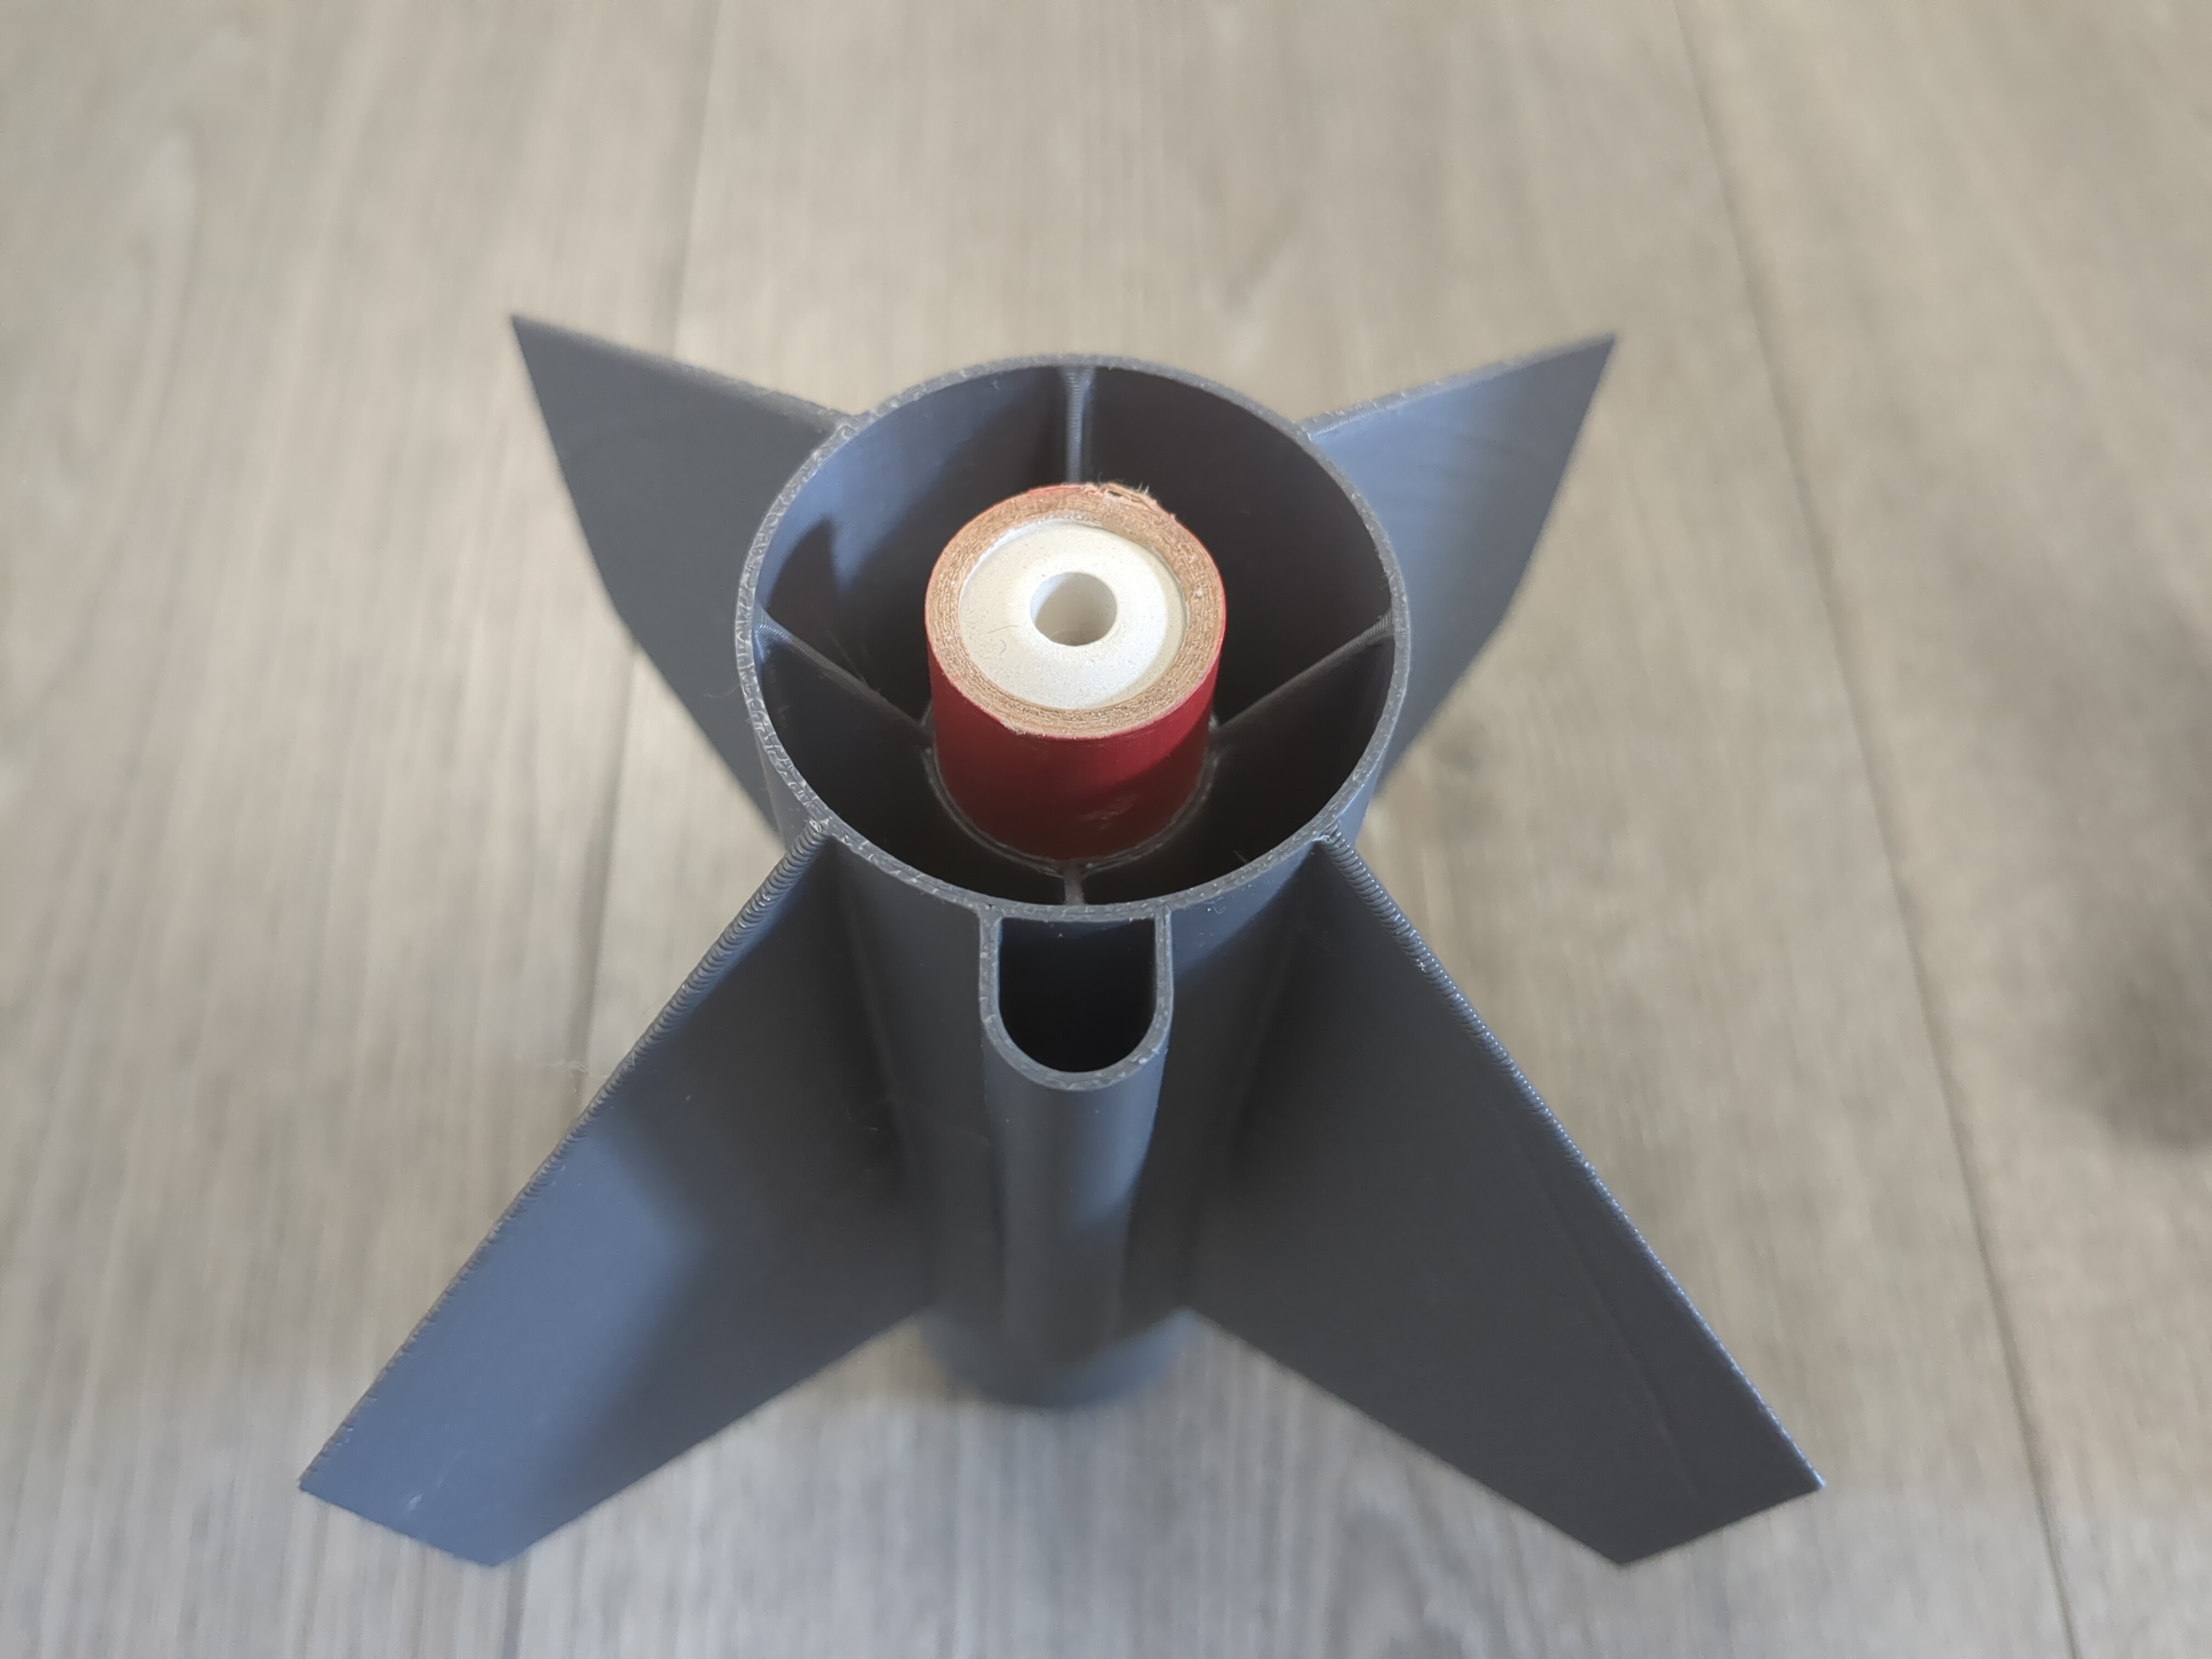
First, one of the first thing I decided was that each rocket body should be 3d-printable, in order to be reproducible in the future and also to have a high construction accuracy. In addition there are geometries, for example fins with particular profiles, that are feasable to print but not to carve out of cardboard or even laminate with carbon or glass fibre.Because of the limitations in the printable height of my 3d-printer, each rocket is divided into multiple sections, each linked together either through glue or screws.

The parachute is made out of scrap fabric, and basic rope. I first cut an octagon of the desired size, reinforce corners with tape, then cut holes in the corners and finally link each opposite corners with the rope. The resulting parachute looks something like this:
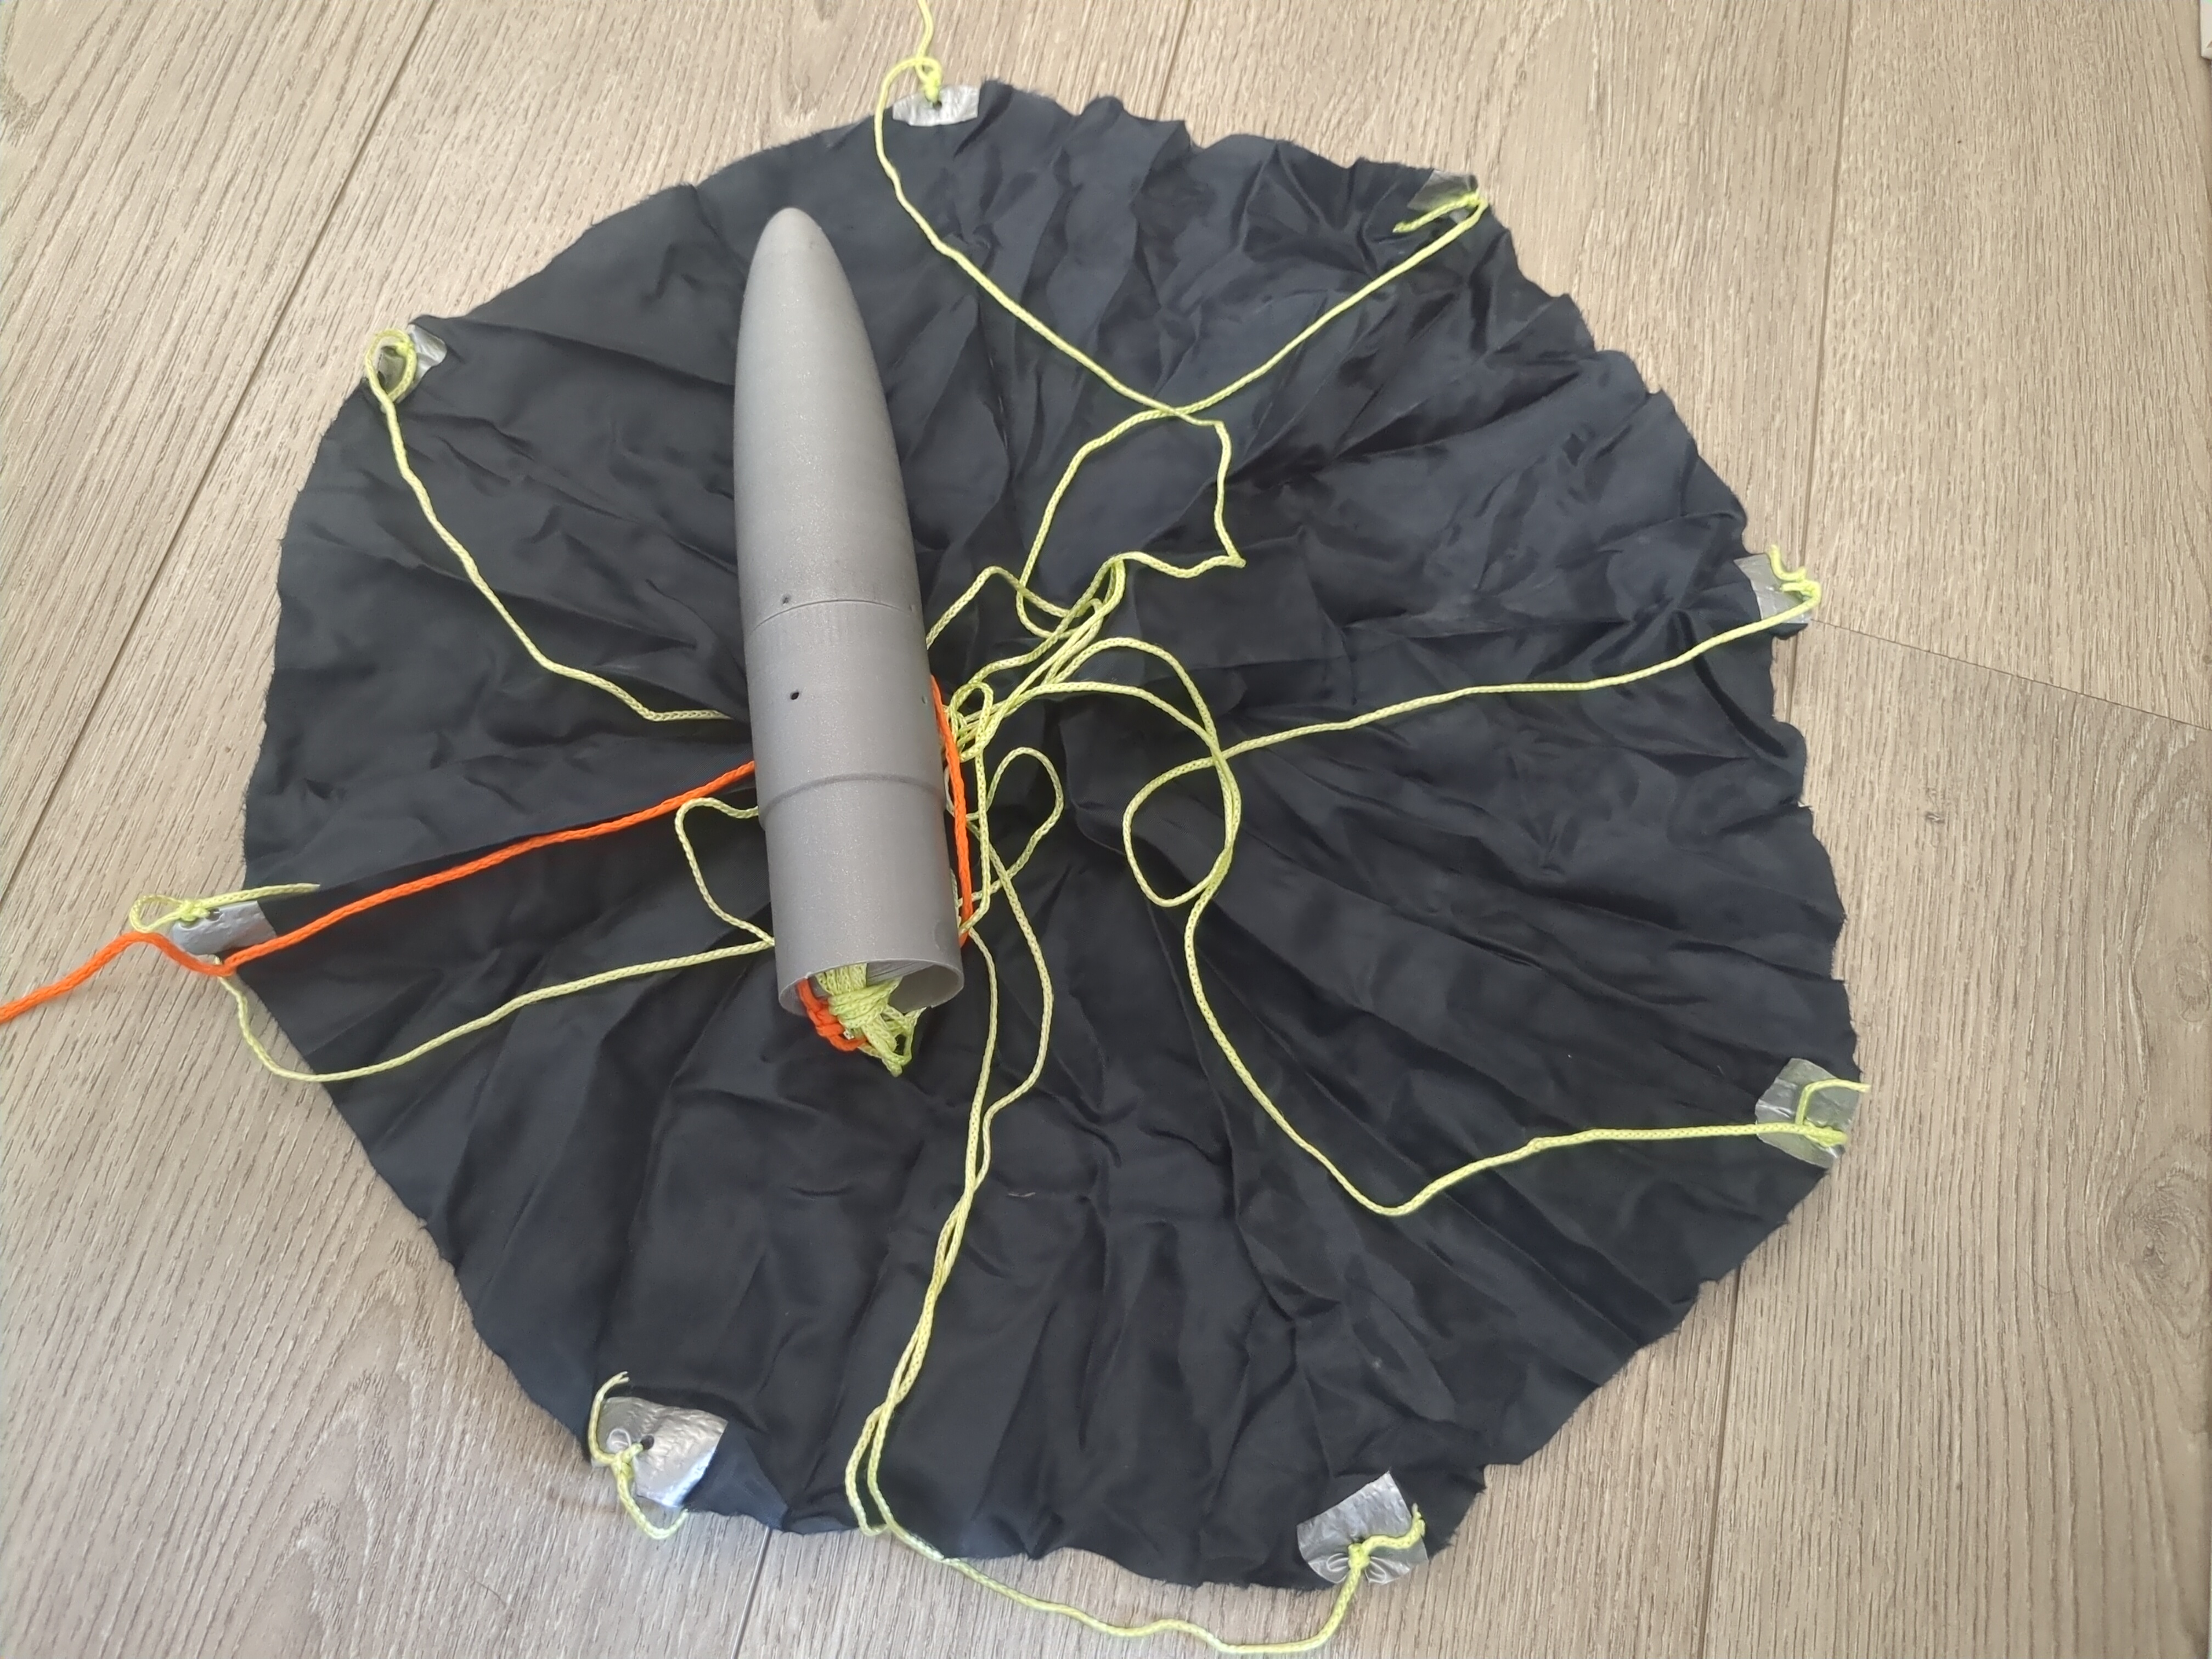
It is very rudimentary but does its job pretty well
Finally, for the rocket engine I decided to start by buying them online. I am using Klima rocket engines, which seems to be available only in Europe, but I think that Estes engines in the US are almost equivalent. The engines are pressed in the engine enclosure and remain attached to it through friction.
March 17, 2024 - First launch!
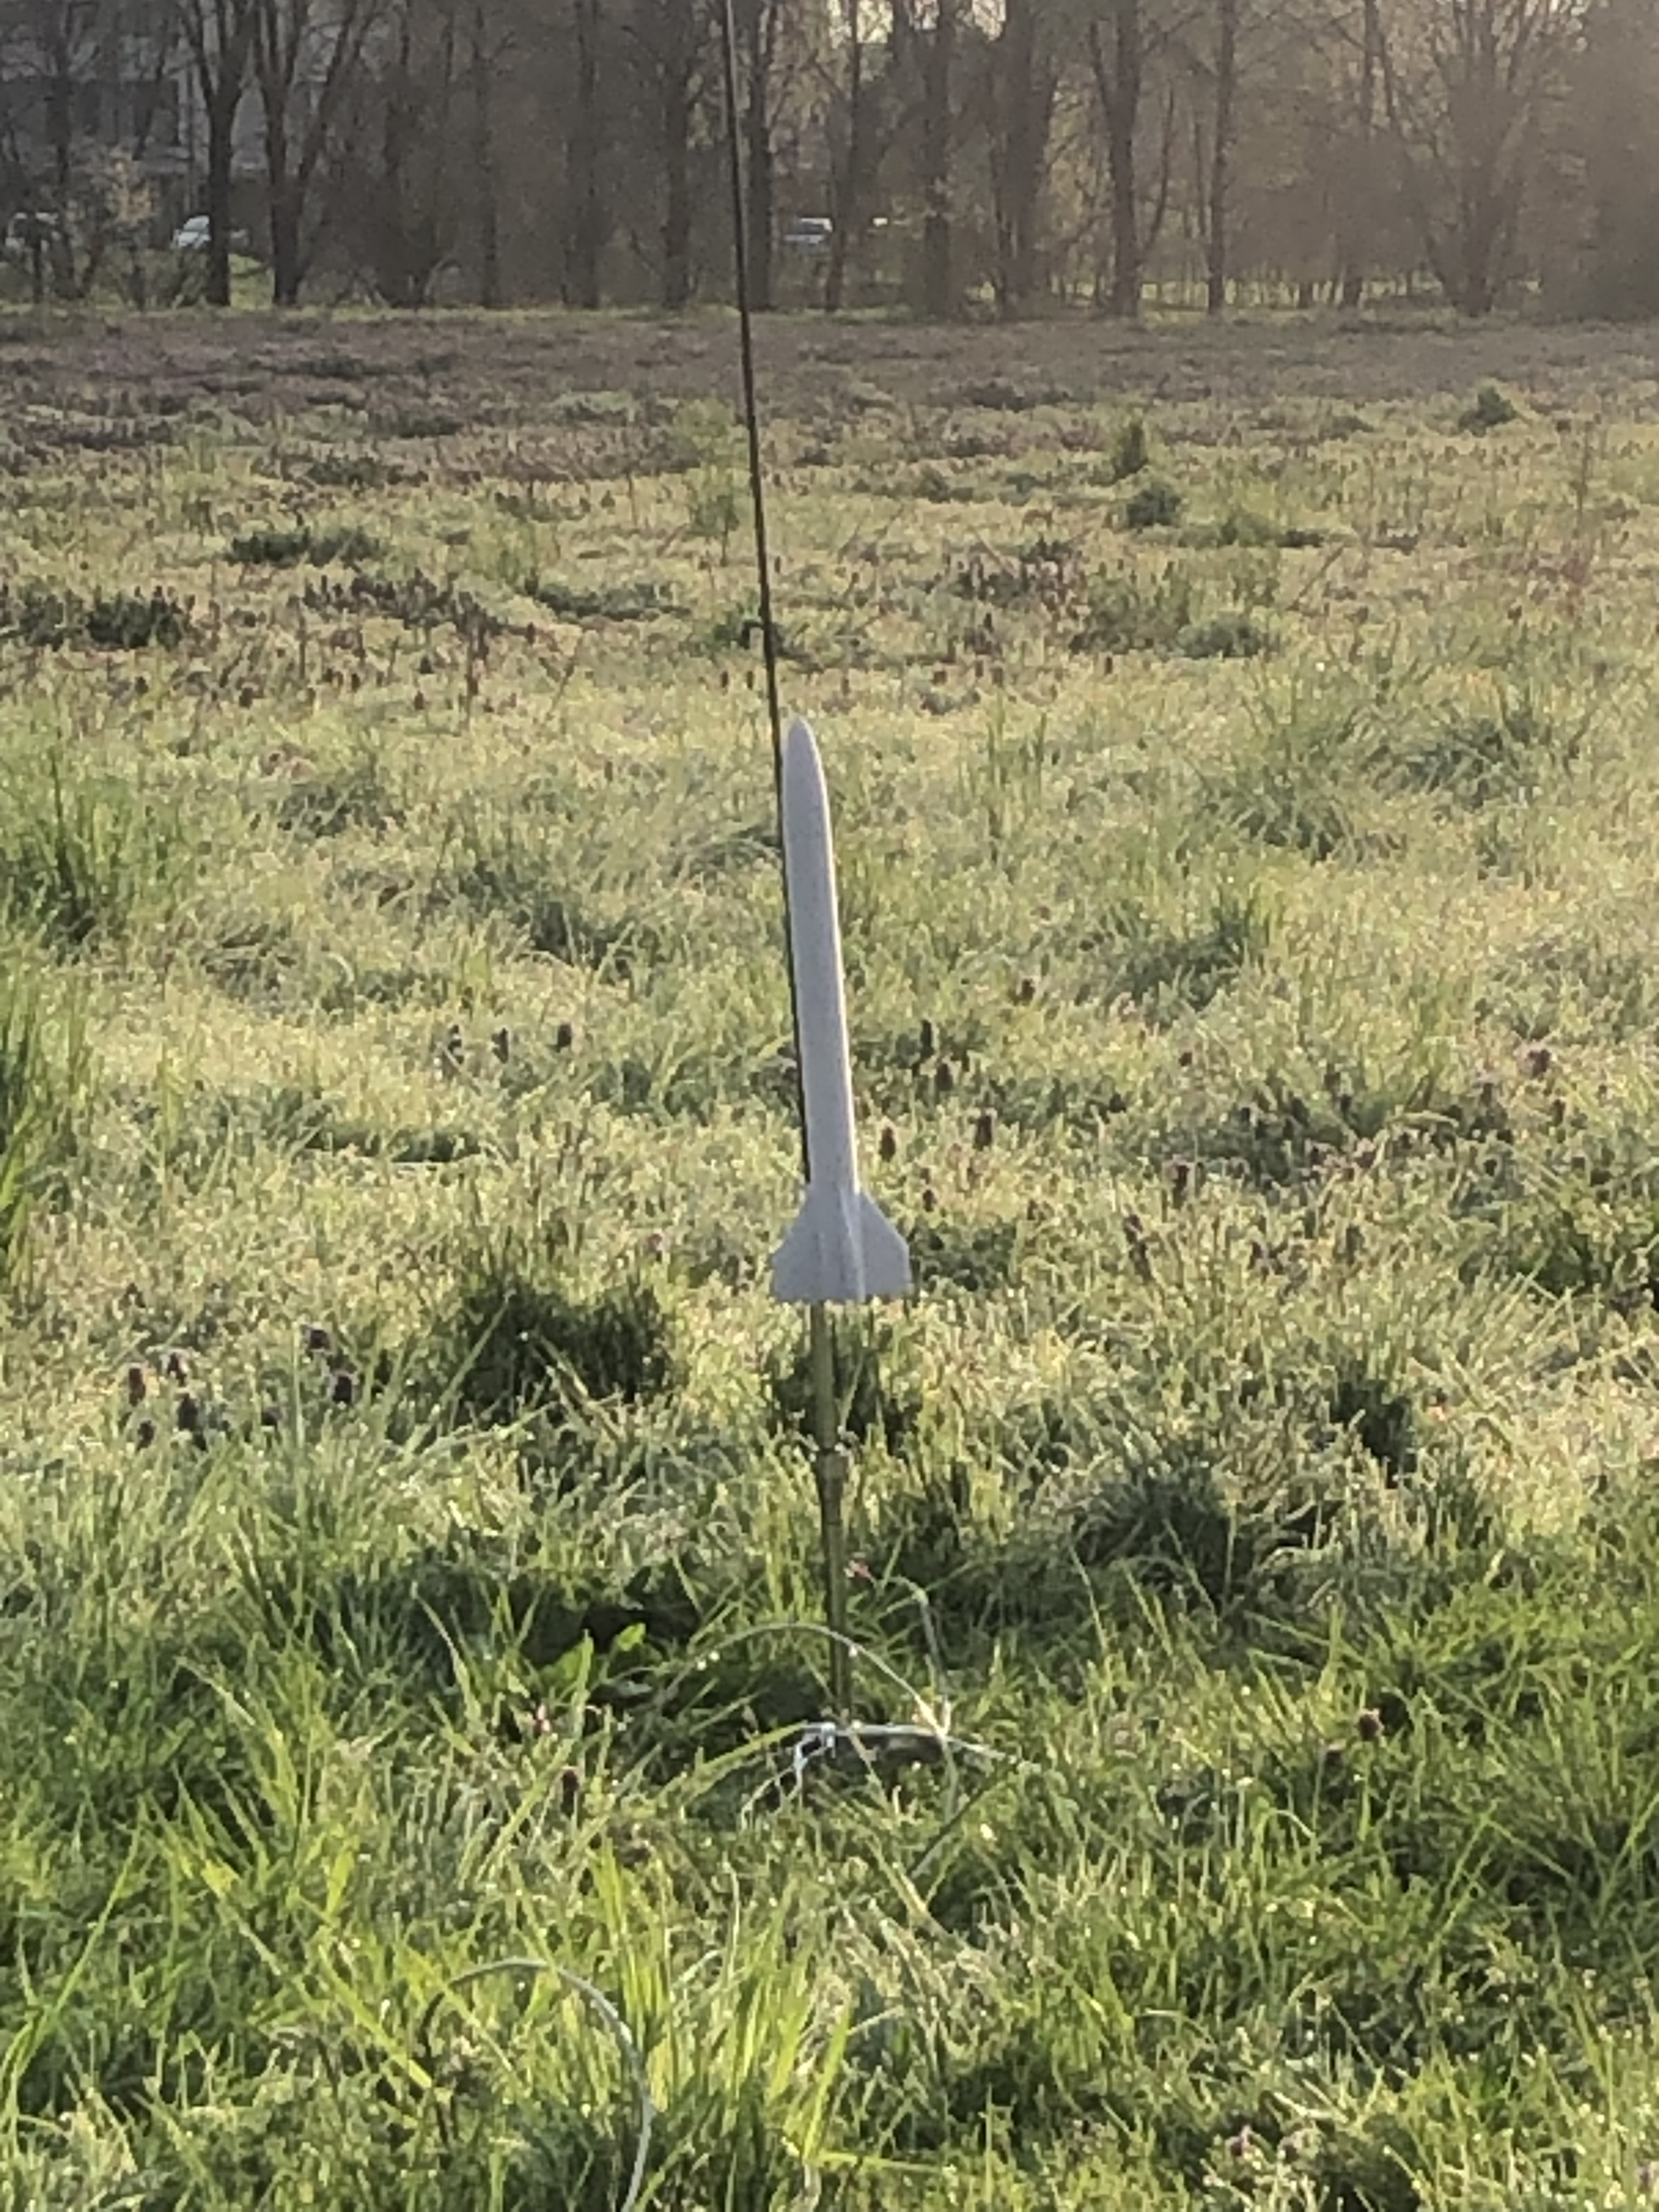
The first two months of work coincided with the exam session, so I had very little time to devote to my new project. After the session finished I had more time and in a few weeks the rocket was ready to launch. It had everything a rocket needs: nosecone, fuselage, parachute, fins, engine. What was missing now was the launch ramp, to keep the rocket upright during the first instant of the flight, and a way to start the power the engine igniter. I built one using a 2m steel rod and a broken drum stand
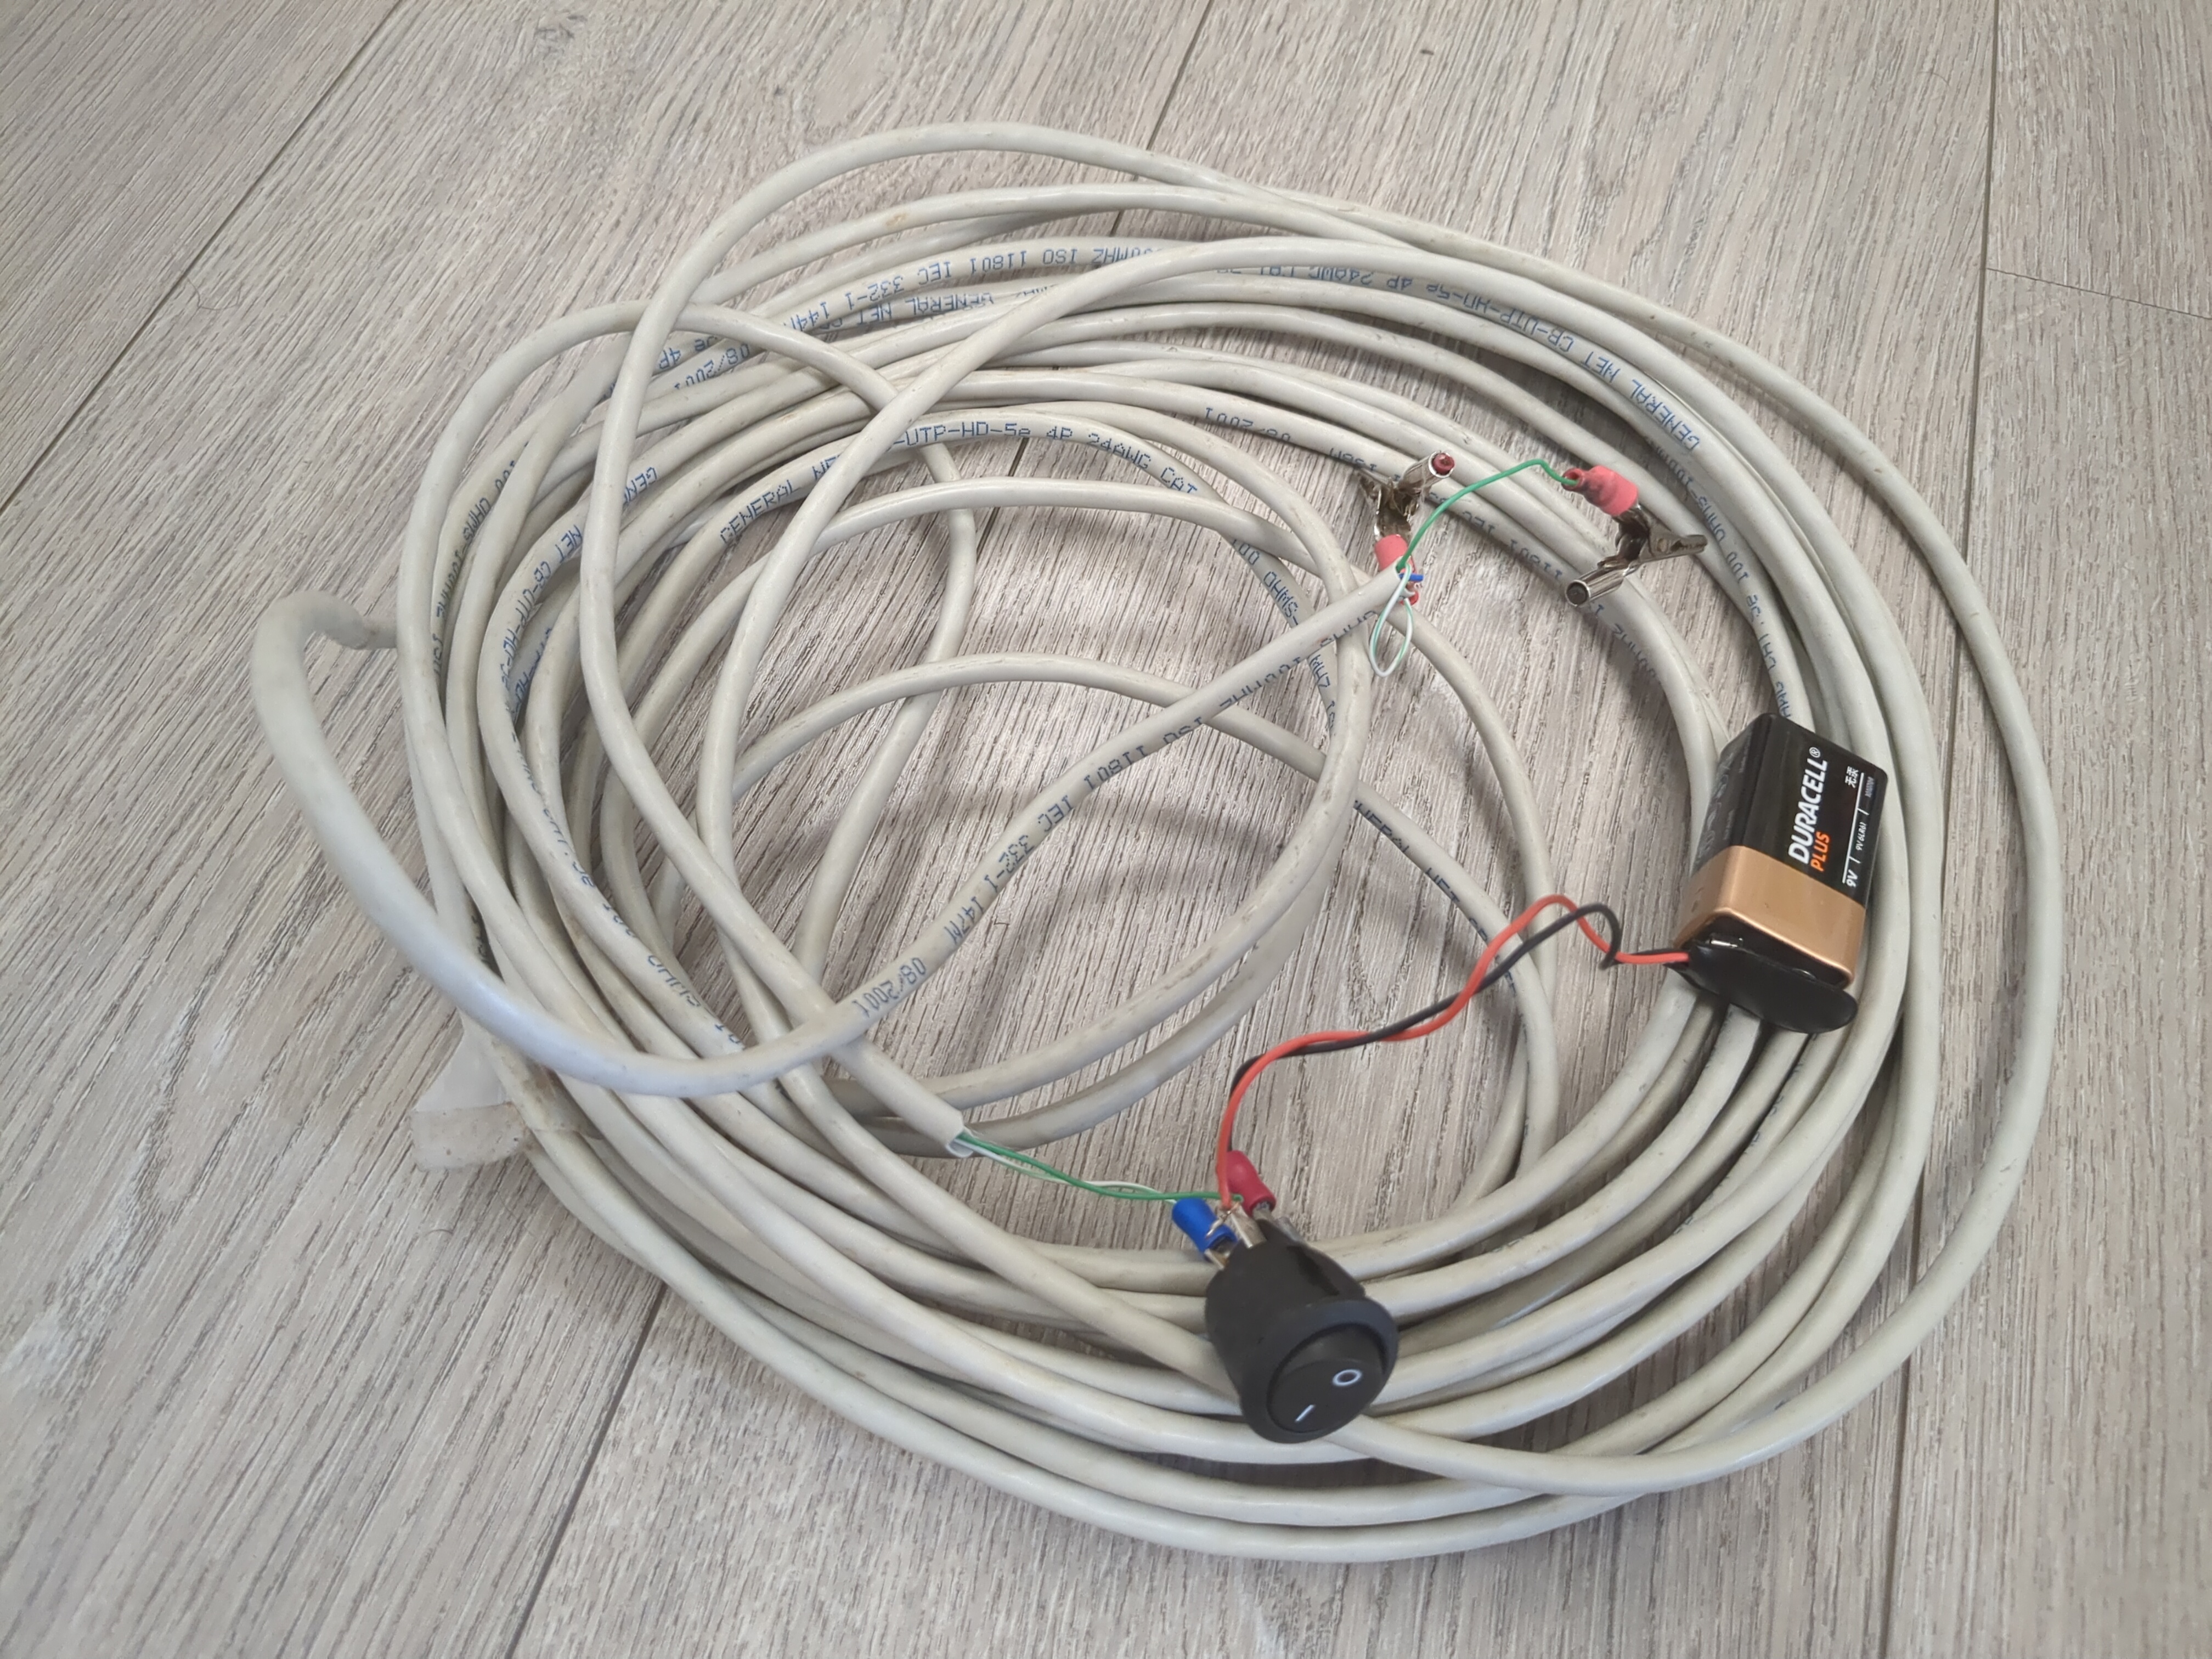
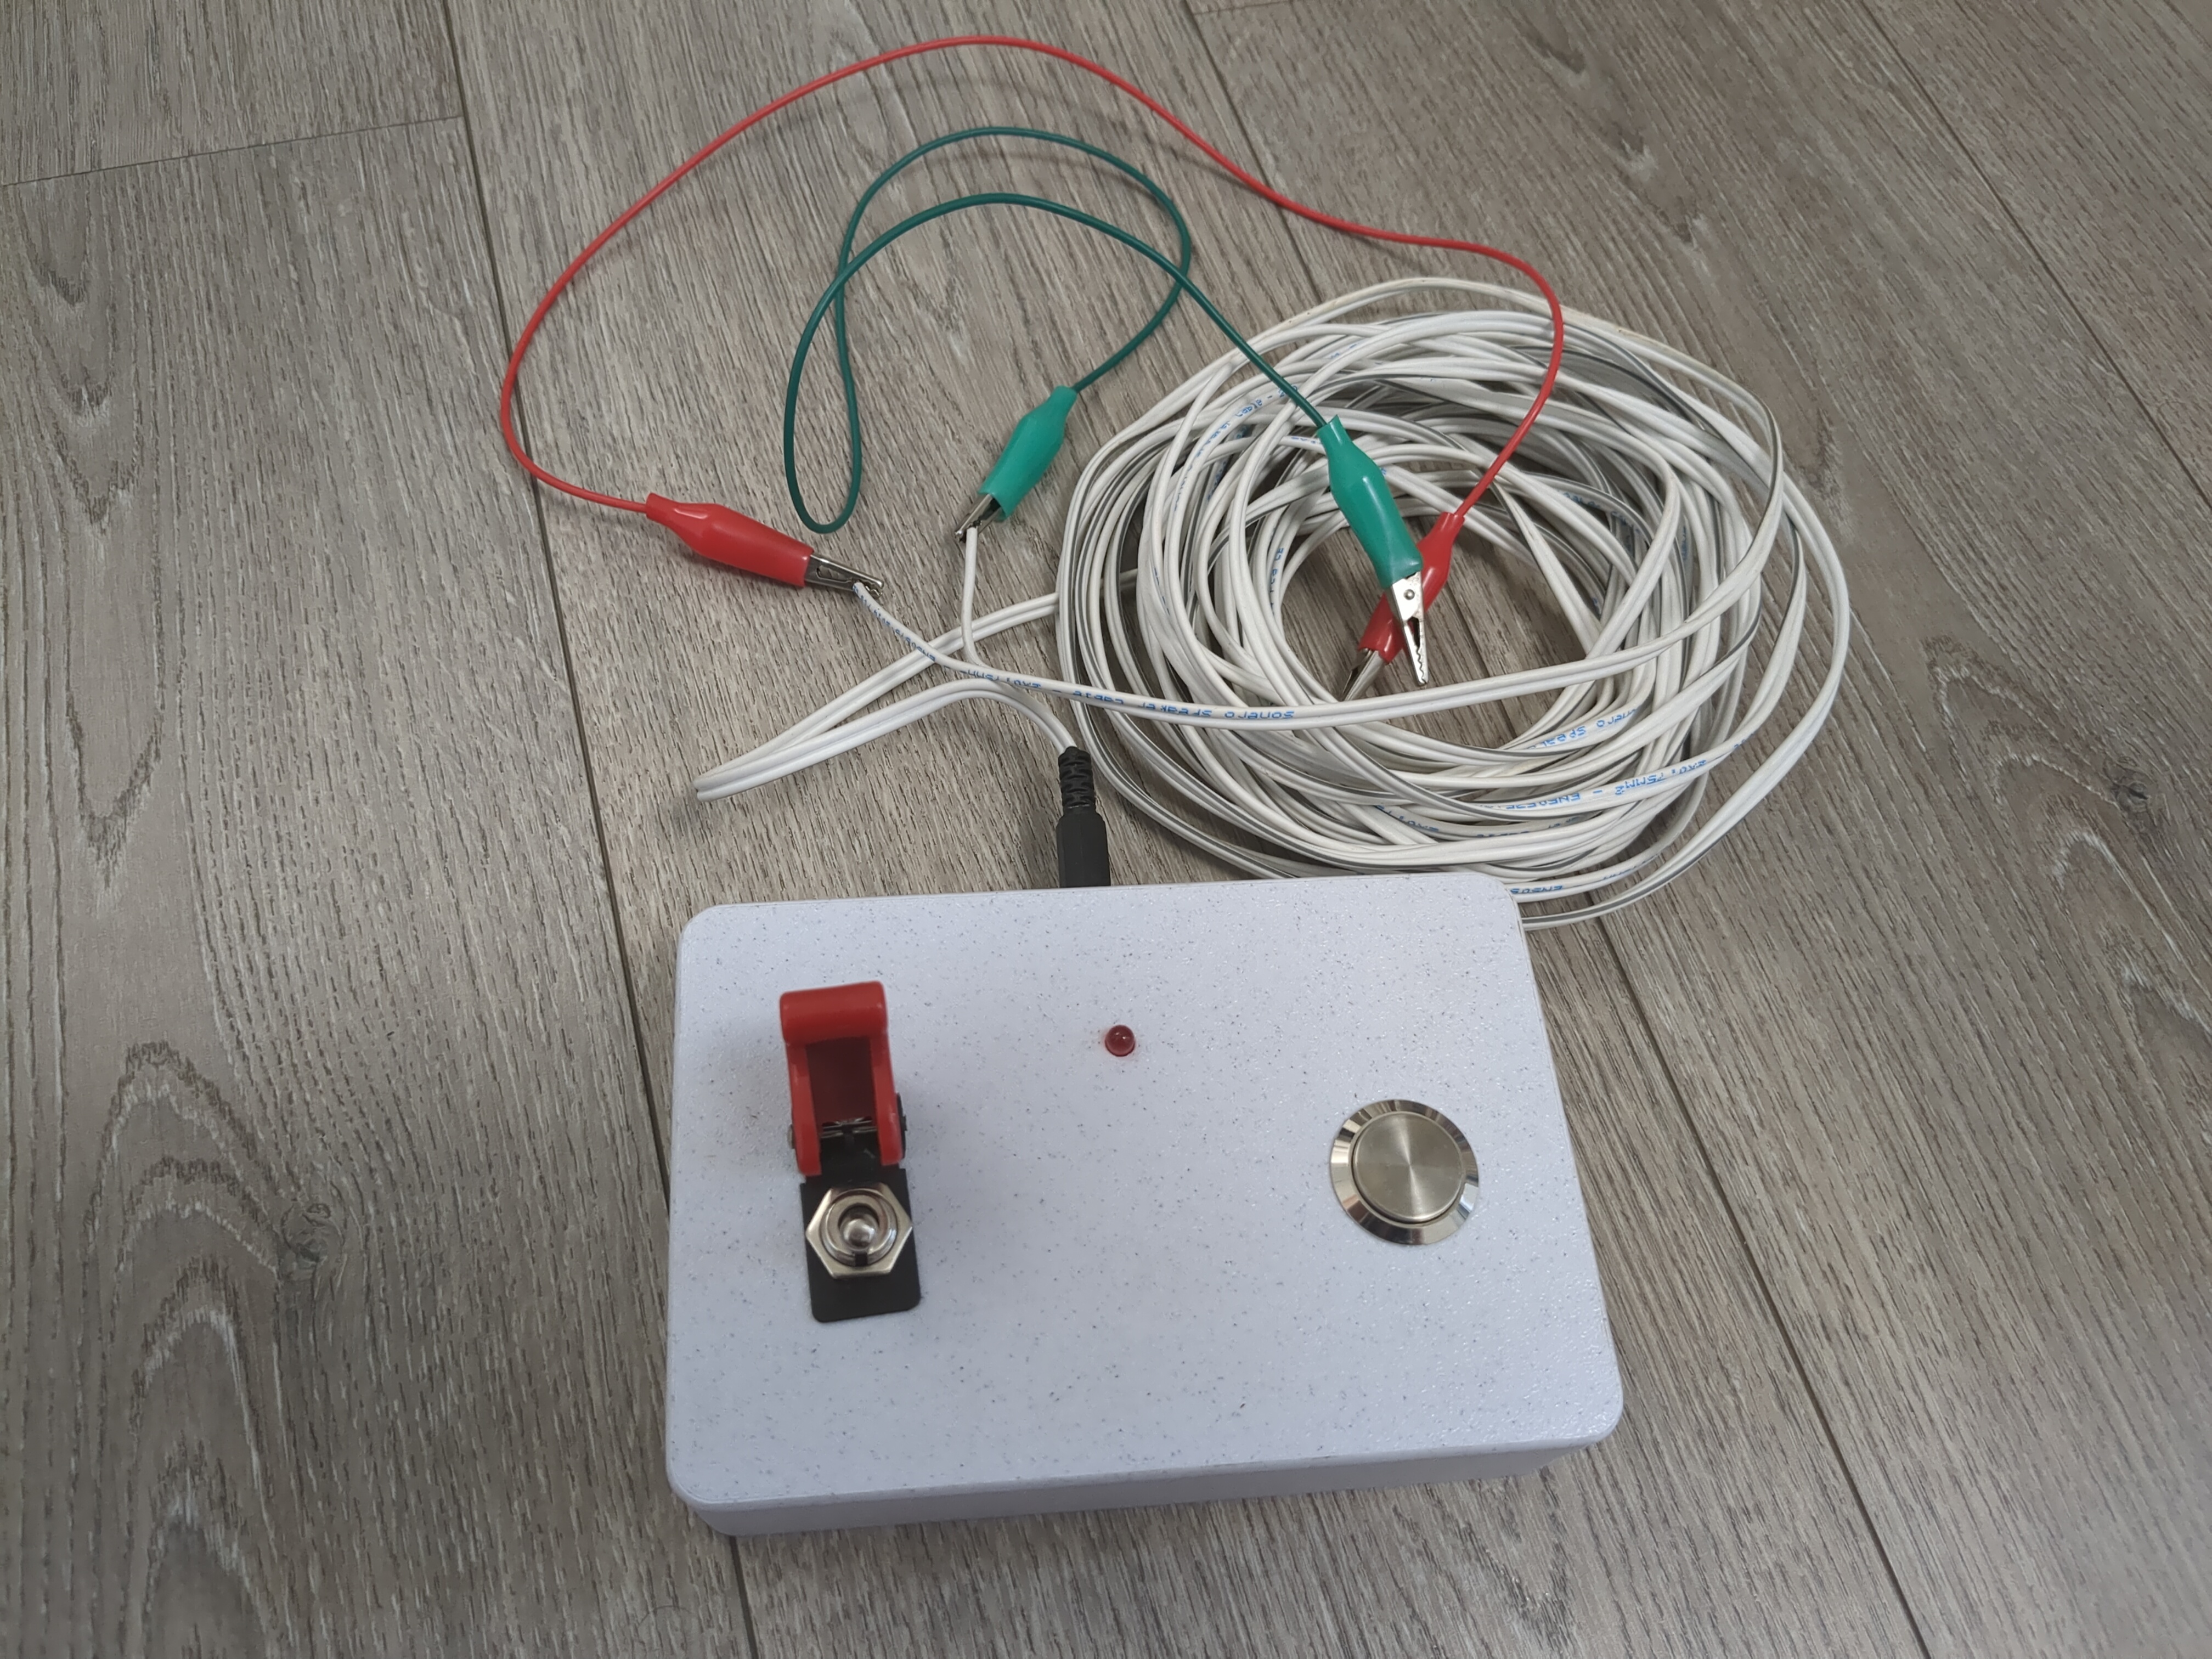
To power the igniter I built a simple contraption with a long ethernet cable I found around in my house, a button and a 9V battery. By attaching the igniter to the opposite end of the cable and by shorting the battery enough current flows through the cable to start the igniter.
Now I only needed to launch the rocket!
Launch 1
The first launch didn't went exactly as I wanted! A few meters above the ramp the rocket spiraled out of control and pointed towards the ground, where it landed pretty violently. After a second the parachute charge blew and ejected both the nosecone with the parachute and the engine. At least that part (partially) worked! Thankfully, apart from a few scratches, the rocket was perfectly intact.
What went wrong? Even though the rocket was theoretically stable, its margin of stability was too low, so even a small perturbation was sufficient to exit from the stability condition.
Launch 2
In order to launch again I needed a way to increase the rocket's stability margin. Being out in the field my options were pretty limited. The solution I found was to take some mud off the ground, and shoving it inside the nosecone. My idea was to bring forward the center of mass, and this in turn will improve the rocket's stability. I took an amount of mud I hoped to be sufficient, then launched again.
It worked! The rocket flew pretty vertical, and in the vicinity of the apogee the parachute was ejected. At first it didn't come out completely and the rocket started the descent faster then expected, but then it finally opened and touched the ground softly. Unfortunately I don't have a video of this first successfull launch.
Launch 3
The third launch went completely nominal, this time the parachute was ejected perfectly and the rocket come back down slow.
This is the first video of a successful launch I made!
May 11, 2024 - Solid improvements
After a few weeks I wanted to launch again. A few modifications were made to address the errors of the first rocket. The rocket was taller and narrower, to improve the stability, and to attach the different parts of the rocket I used the improved design, using screws instead of glue. This let me open the rocket and change a single component in case of a failure.

I also designed a launch box, an improvement of the ethernet cable contraption. Unwisely, I didn't test it before going to the launch site, and due to a faulty connection it didn't work, so I had to resort to the trustworthy contraption.
Launch 1
I lost the recording of the launch, so I will rely on memory. The launch went very well, thanks to the improved stability and lower mass it flew incredibly straight and way higher than the previous rocket. Unfortunately it landed behind a tree line, and I lost contact with it. We found it when, after losing all hopes of finding it, we were coming back home. Because of this that day we launched only once.
July 22, 2024 - Working launch box
Between this and the previous launch date I had little time due to the exam session, so little modifications where made to the rocket. Since in my roadmap I had planned to start putting electronics inside the rocket, I designed the electronics bay to test its structural integrity. Because of this the rocket was also slightly larger. For this date I also fixed the launch box.
Launch 1
The launch was nominal. It went less high and straight than the previous rocket, because of its dimensions, but everything else was perfect.
Launch 2
The second launch wass less ideal. Due to the wind the rocket steered and pointed towards the tree line, and the parachute took some time to fully deploy. The rocket ended up stuck on a tree, and I was able to recover it only the day after!
November 17, 2024 - Electronics!
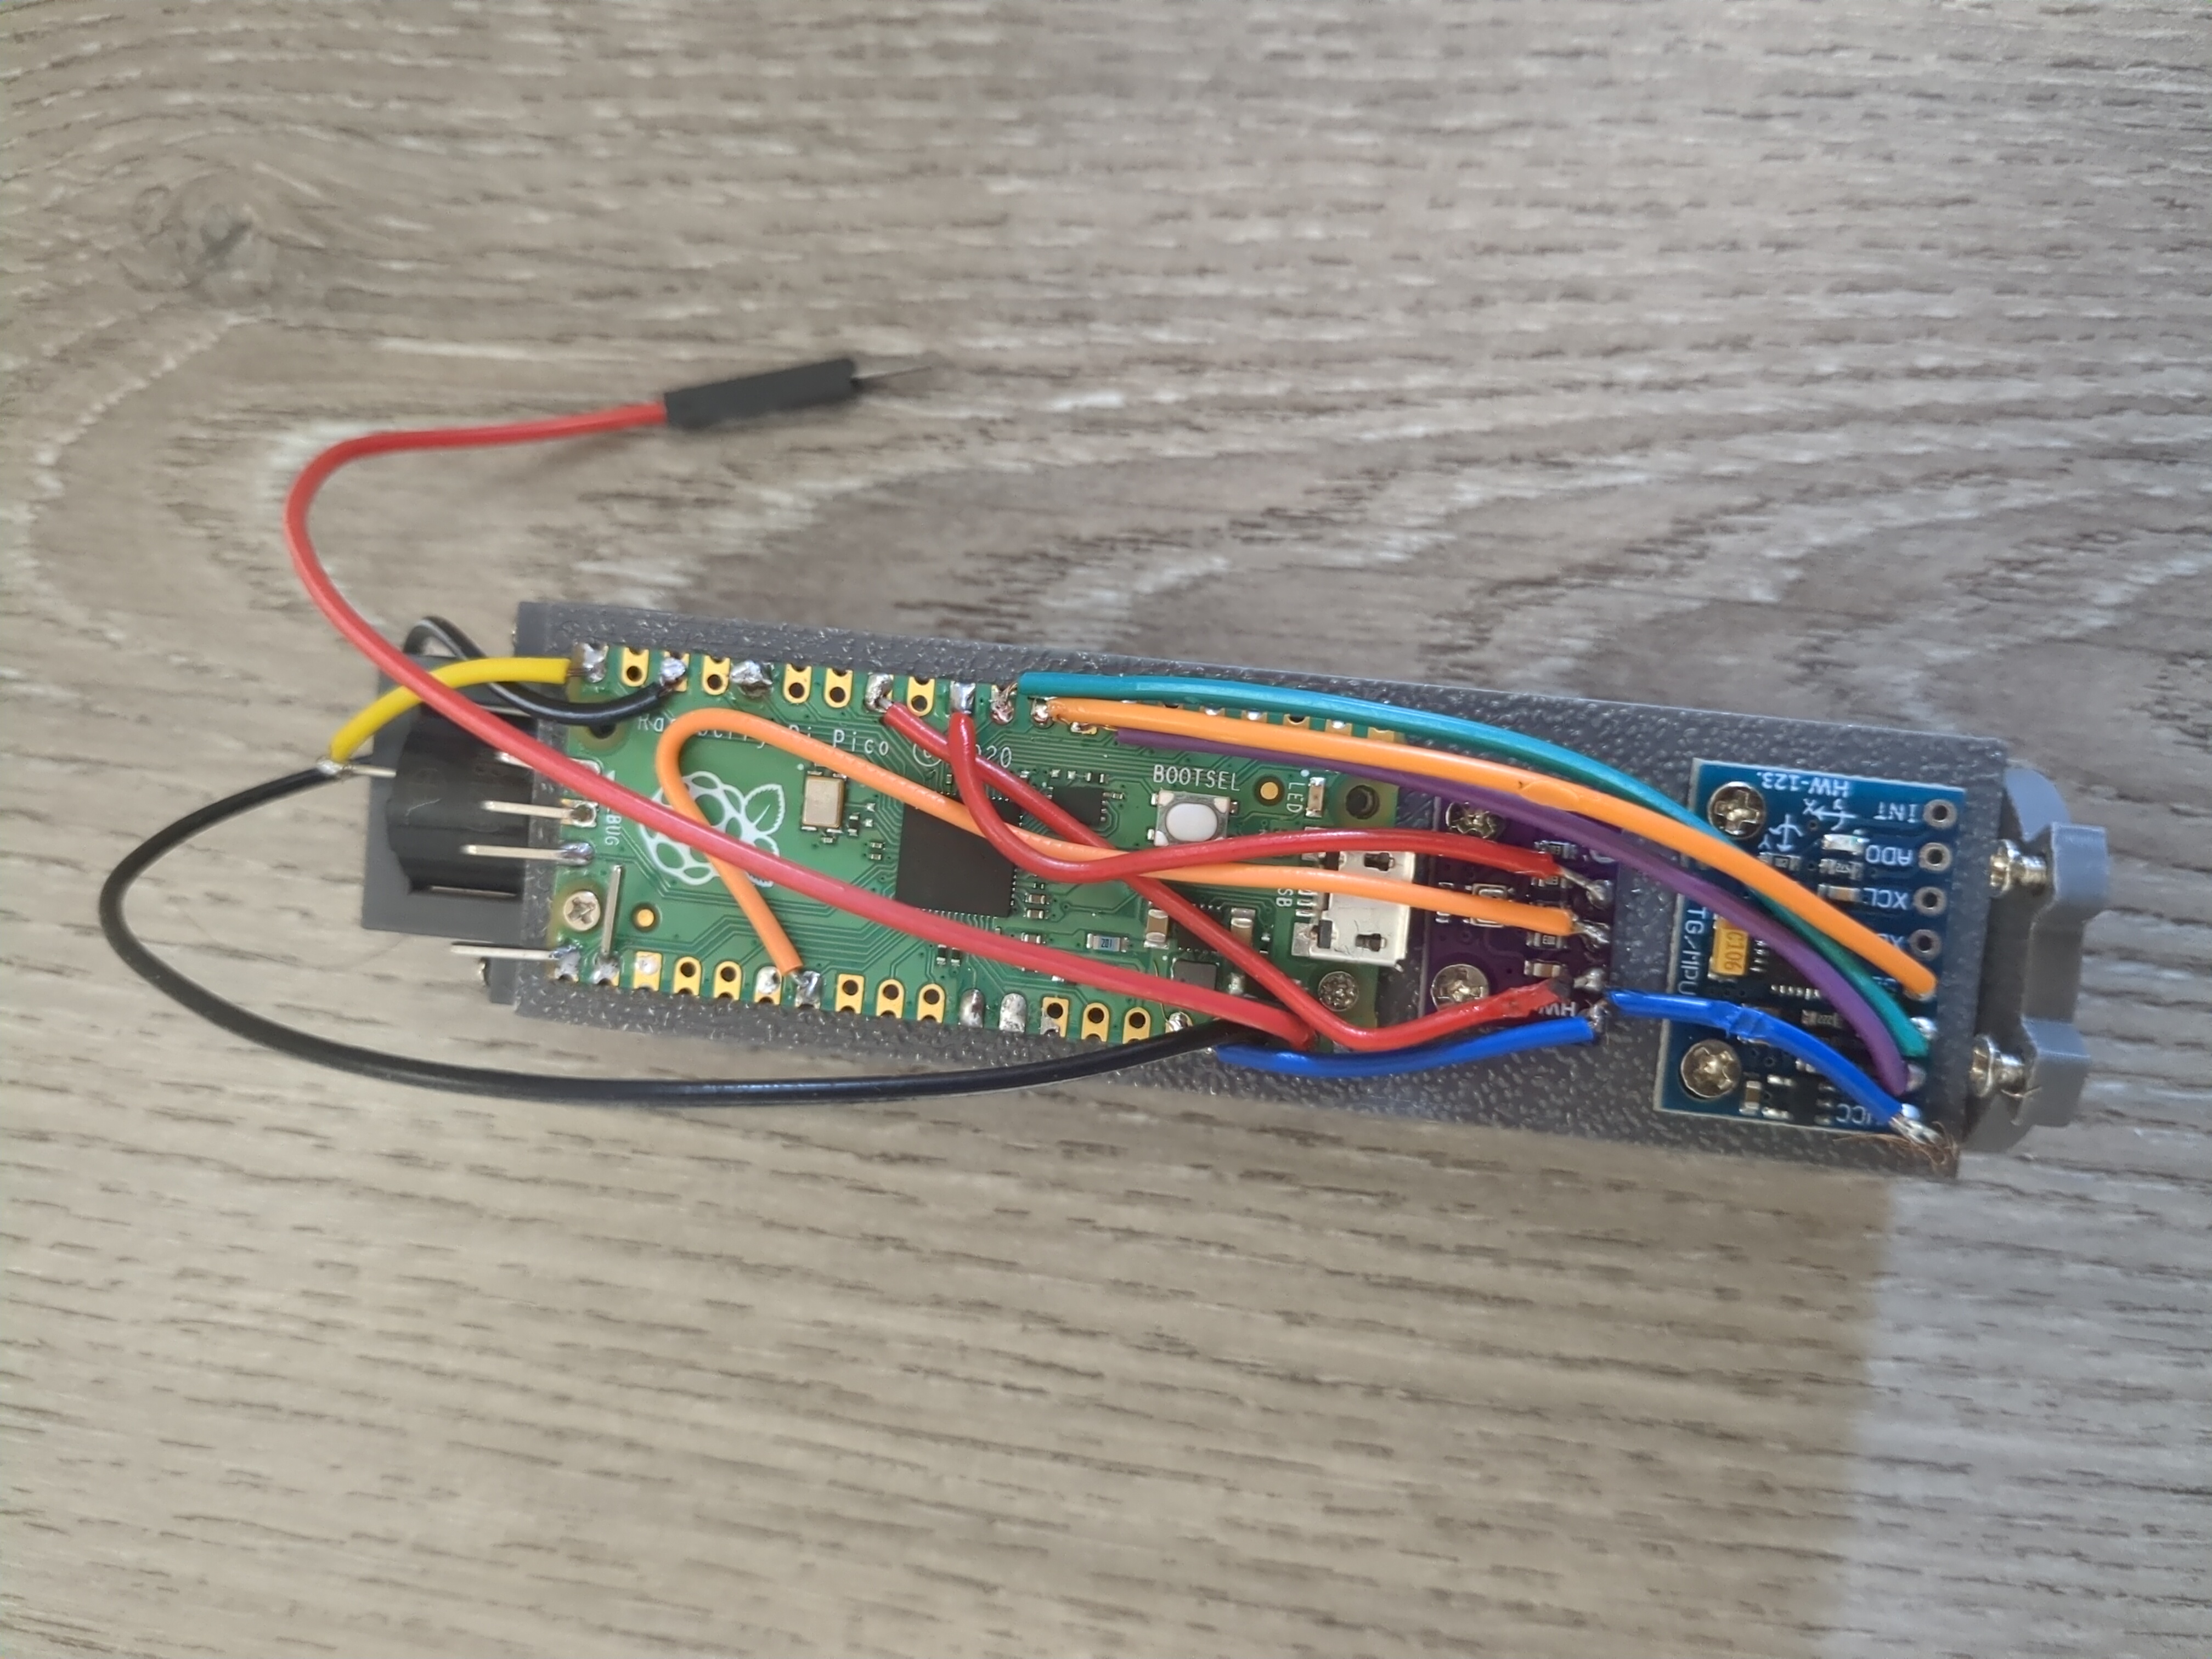
After I felt confident in the structurale design of the I decided to focus on the electronics. In the future I would like for the electronics to be in charge of sampling sensor data, opening the parachute when the apogee is detected, and maybe even active stabilization. For this first launch I only implemented sensor sampling for two sensors, barometer and accelerometer. For the microprocessor I decided to use a Raspberry Pi Pico, as it is very cheap and easy to program, and also small enough to fit in the rocket.

For this first launch the software was very immature, and I relied on an external library to store the data in the on board flash. Unfortunately this library was not very fast, and thus I was able only to sample the sensors at a very slow rate of only 2Hz. Still It had been a few months since my previous flight, and I was eager to launch again, even if the software was not so ready. The objective of the launch was thus to see if the electronics would survive the launch, more than anything.
Launch 1
This day the launch conditions were perfect, with almost no wind. The flight was perfect and landed very near the launch position. Because of the electronics the rocket was bigger and heavier than the previous ones, so the apogee was lower and the parachute expulsion happened after it, so not ideal, but apart from this everything else was perfect.
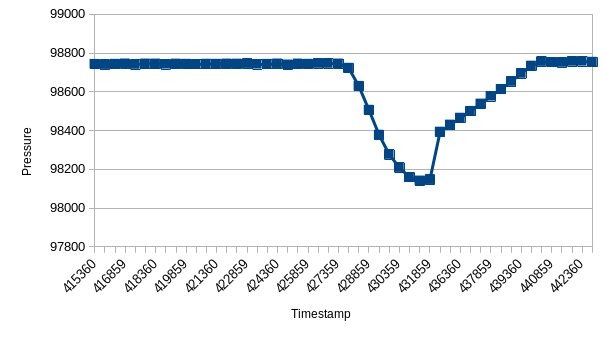
The pressure was sampled with very low frequencies, but we can still see the pressure drop due to the altitude change of the rocket!
Launch 2
This launch went pretty much like the previous one, apart from a slightly delayed parachute expulsion that had me worried for a little bit.
Also in the second launch the pressure data was sampled, and showed the same behaviour, as expected.
February 23, 2025 - Flight recording
After the winter exam session I focused on improving the electronics. I ditched the external library for custom code, that enabled the semsor sampling at a rate of 50Hz, high enough for the apogee detection code, that was implemented for this occasion. I also added a buzzer to the electronics stack, in order have a confirmation of when the rocket was armed and recording the sensor data.
Launch 1
This launch was unexpectedly very complicated. I first encountered problems with the engine ignition, I was not catious with the igniter and I created a short-circuit, preventing currect from flowing in the igniter. After solving this problems the rocket ascended nominally, but I then encountered problems with the parachute opening, the first in a long time: the cord reponsible for keeping the nosecone attached to the rocket body untied, and the rocket body falled uncontrolled on the ground, while the nose-cone with the parachute descended slowly.
Fortunately the rocket was very light and the ground was pretty soft, so the body was recovered without any damages. I was very fortunate as I didn't have any spare parts, so I would have to abort the successive launches
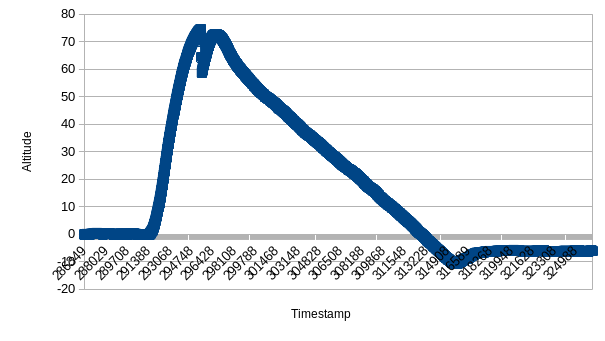
In this image we can see the rocket altitude computed by the rocket itself during launch. At the apogee we can see that the altitude suddenly drops: this is because the parachute expulsion increases by a lot the internal pressure for a split-second, and this increase in pressure is equivalent to a drop in height. By also using the accelerometer the rocket is quickly able to recover the true rocket altitude. We can also see that at the end the rocket altitude is negative. This is due to the fact that being not vertical, the rocket thinks it has a negative accelration, and it leads to it thinking that it is below the ground!
Launch 2
For the second launch I again encounterd problems with the engine start, this time due to a faulty igniter. After changing it the launch proceded nominally, with the parachute finally opening without problems. However, because of the problems of the igniter, the rocket stayed on the ramp for a prolonged period of time. During this time the rocket was armed, and the amount of data recorded filled the on board flash. No data of the flight was thus recorded. Moreover I had a problem with the recording of the video, a total disaster!
Launch 3
Third time the charm! This time we had no problems at all. The launch proceded nominally and all data was recorded
The behaviour of the computed altitude was the same as the first launch, so we have a confirmation of the fact that the software is robust!
Future
Even with these successfull launches, there are still a lot of things left to do before I feel satisfied.
The first thing that needs to be implemented is a way to open the parachute with the on board electronics. I think the best way to to this is through an black powder ejection charge, with the igniter powered with a capacitor and a power transistor. In addition to the electronics design, another difficulty arises with the ejection charge itself, since acquiring black powder is not simple in Italy, and so I need to cook black powder myself.
Anohter thing I want to do is having custom pcbs for the electronics. I may still rely on off the shelf boards for the sensors and compute elements, which are very difficult to solder, but I want a custom motherboard for a simpler and tidier design compared to what I have come up before.
The third thing is custom rocket engines. Off the shelf engines are limited in power, and thus limit the total mass of the rocket. They also don't come in every size, so one of them may be too powerful and the other too weak for what I have in mind. Still, for now I think I can live with these limitations, so this may take I while to do.
So these are what I intend to work on in the future. Let's see in a year what I was able to do!